Removing eyelash extensions is one of the most delicate procedures in the lash industry. Whether you’re a professional lash artist or just starting, knowing how to remove extensions safely and effectively is essential to protect your client’s natural lashes and eye health.
In this article, we’ll walk through two professional lash extension removal methods—one using eye patches and cream remover, and one using tweezers or micro brushes. You’ll learn which method is best for different situations and how to avoid common mistakes that can cause irritation or lash damage. Now, let’s begin our journey.
Why Safe Lash Removal Matters
Eyelash extensions are bonded with a strong adhesive; improper removal can lead to natural lash loss or skin irritation. Using the right remover and gentle techniques ensures your client’s lashes remain healthy and ready for their next set.
Among all products, cream removers are the safest and most beginner-friendly option due to their thick consistency and minimal risk of leakage into the eyes.
Method one: With eye-patches
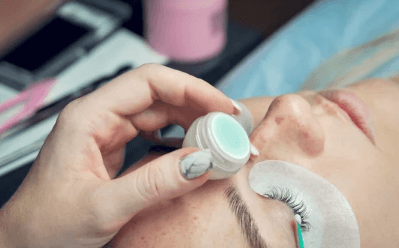
You will need a cream remover, two eye patches, and a micro brush. You have to use cream remover due to its consistency. We do not suggest using gel remover. Because this remover may irritate the client’s eyes if applied to lashes for a long time.
What You’ll Need:
- Cream lash remover (avoid gel remover for this method)
- 2 pairs of under-eye patches
- Micro brushes
- Tweezers.
Step-by-Step Instructions:
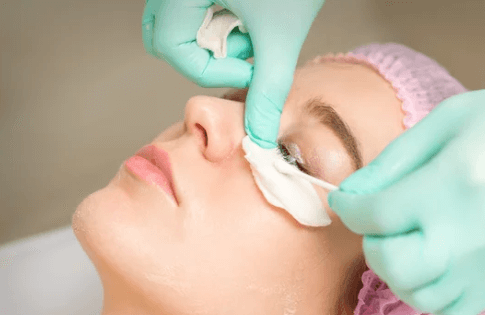
- Apply Eye Patches—Place under-eye patches as you would during a lash service to protect the skin.
- Apply Cream Remover—Use a micro brush to apply a thin, even layer of cream remover along the lash line, focusing on the base of the extensions. Avoid excess products.
- Add Top Patches—Place a second pair of eye patches gently over the lashes, leaving about 1.5–2 mm of space from the eyelid. This creates mild heat and helps speed up the removal process.
- Wait and Let It Work—Allow the remover to sit for 10–12 minutes (always follow manufacturer instructions).
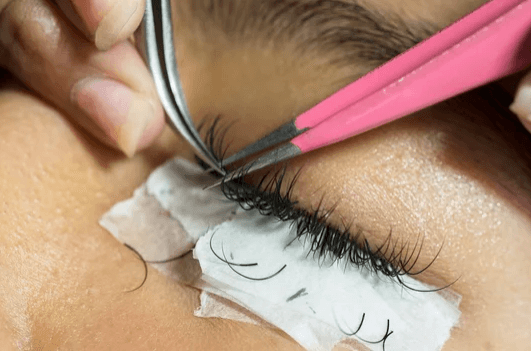
- Remove Extensions—Using tweezers, gently lift the extensions. If they slide off easily, they’re ready.
- Remove Patches Carefully—Hold both patches together and slowly peel away, ensuring the client’s eyes remain closed. Most extensions will come off cleanly between the patches.
- Clean the Lashes—Use a clean micro brush and water to remove any remaining remover residue. Finish with a gentle lash bath to cleanse the natural lashes.
Method two: With tweezers or micro brushes
This method is more precise and works well for partial removals or experienced lash artists.
What You’ll Need:
- Cream or gel lash remover
- Under-eye patches
- Tweezers or micro brushes
Step-by-Step Instructions:
- Prepare the Eye Area—Place under-eye patches to protect the skin.
- Apply Remover—Apply a small amount of remover to the lash base. Ensure an even coat without oversaturation.
- Wait—leave the remover for the recommended time (usually 10 minutes).
- Remove the Extensions:
- Via Tweezers: Check if lashes are ready. If yes, gently grip extensions near the base and slide them off the natural lashes. Work gently to avoid pulling.
- With Micro Brushes: Use two brushes—one above and one below the lashes—and press softly together to glide extensions off.
- Clean the Area—Once all extensions are removed, use clean tools to wipe off any remaining remover.
- Lash Bath – Finish with a lash shampoo to remove any residue and refresh the natural lashes.

Pro Lash Artist Tip
Regardless of the removal method you use, always work in a downward motion. This can cause clients’ eyes to open accidentally, leading to irritation from remover fumes. Always work parallel to the lash line for maximum safety.
Aftercare Reminder
After a lash removal, always:
- Rinse thoroughly to remove residue.
- Advise clients to avoid oils or makeup for 24 hours.
- Recommend a lash serum or conditioning treatment to strengthen natural lashes.
Final Thoughts
Learning how to remove eyelash extensions safely is a core skill for every lash artist. By using the right tools, following the correct timing, and maintaining gentle precision, you’ll protect your client’s natural lashes and ensure their trust in your professionalism.
Remember—lash health always comes before speed.